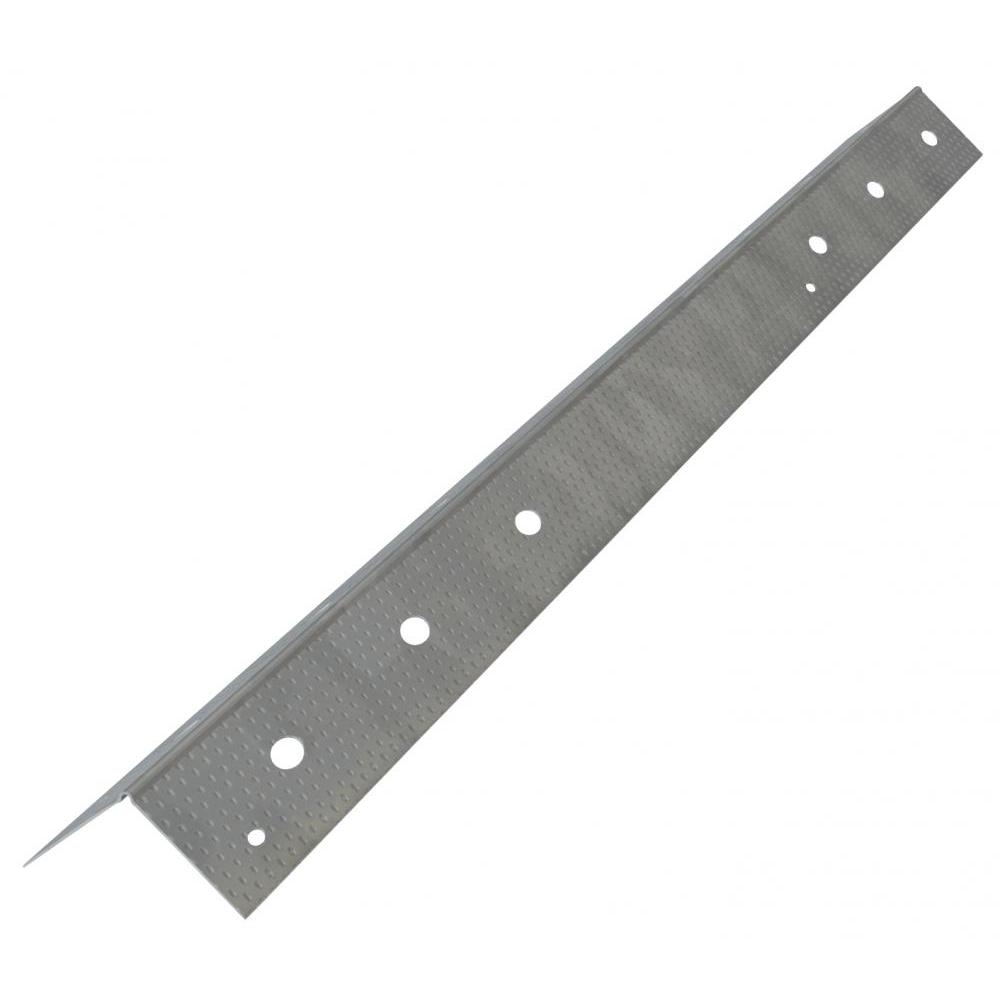
Premier drywall finishing bead
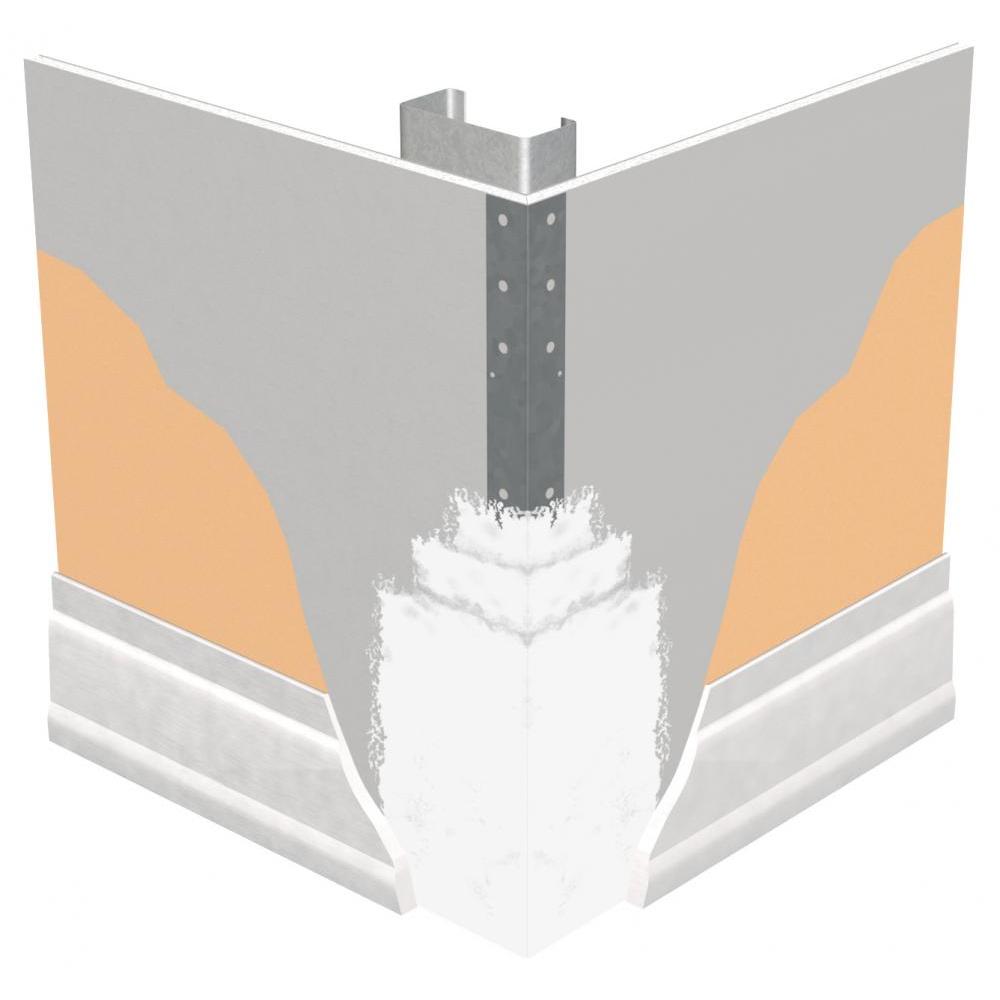
Clinch-On Corner Bead is recognized as the premier product for providing sturdy metal reinforcement on 90° drywall corners.
Knurled and perforated flanges, along with the electrogalvanized coating, offer superior compound adhesion for smooth, straight finishes. Corner bead attachments are accomplished by nailing, stapling, screwing or clinching through the flanges.
(Clinch-On® Beads are available in the East Coast only)
- Sturdy metal reinforcement for 90° drywall corners
- Specialized coating offers effective compound adhesion
- Nailed or clinched to framing and drywall
Material: 0.012 min thickness, galvanized coating
Product Data & Ordering Information
| Product code | Width | Length | Pcs./Ctn. |
|---|---|---|---|
| CBCO | 1-1/4" x 1-1/4" | 6' | 75 |
| 1-1/4" x 1-1/4" | 6' 9" | 75 | |
| 1-1/4" x 1-1/4" | 6' 10" | 75 | |
| 1-1/4" x 1-1/4" | 7' | 72 | |
| 1-1/4" x 1-1/4" | 8' | 63 | |
| 1-1/4" x 1-1/4" | 9' | 56 | |
| 1-1/4" x 1-1/4" | 10' | 50 | |
| 1-1/4" x 1-1/4" | 12' | 50 |
INSTALLATION
Metal corner beads can be installed using a variety of methods. You may choose to do a combination of all three.
For regular metal corner bead, the drywall does not need to be set back.
Method 1: Staples
- Measure the wall height and subtract ½”. Measure and cut the corner bead using aviator snips. Dry fit to ensure accuracy.
- Position the bead on the corner and staple each mud flange every 6” to 10” with ½” staples.
- Using an 8” taping knife, apply the first coat of joint compound to the surface of the corner bead. The use of lightweight or setting-type compound in this step will reduce shrinkage and speed up drying time. Let this dry completely, for several hours or overnight.
- Using an 8” or 10” taping knife, apply a light finish coat of joint compound. Feather the compound beyond the previous coat. The use of all-purpose or topping compound will make for a more durable finish. Let this dry completely, for several hours or overnight.
- Sand lightly with 120 grit sandpaper.
Method 2: Screws or Nails
- Measure the wall height and subtract ½”. Measure and cut the corner bead using aviator snips. Dry fit to ensure accuracy.
- Position the bead on corner and fasten the bead with screws or nails using the smaller nail holes on each mud flange.
- Using an 8” taping knife, apply the first coat of joint compound to the surface of the corner bead. The use of lightweight or setting-type compound in this step will reduce shrinkage and speed up drying time. Let this dry completely, for several hours or overnight.
- Using an 8” or 10” taping knife, apply a light finish coat of joint compound. Feather the compound beyond the previous coat. The use of all-purpose or topping compound will make for a more durable finish. Let this dry completely, for several hours or overnight.
- Sand lightly with 120 grit sandpaper.
Method 3: Clinch-On Tool
- Measure the wall height and subtract ½”. Measure and cut the corner bead using aviator snips. Dry fit to ensure accuracy.
- Position the bead on the corner. Place the clinch-on tool over the bead.
- Hit the tool with a rubber mallet to crimp the bead to the corner, repeating every 8” to 10” for optimum fastening.
- Using an 8” taping knife, apply the first coat of joint compound to the surface of the corner bead. The use of lightweight or setting-type compound in this step will reduce shrinkage and speed up drying time. Let this dry completely, for several hours or overnight.
- Using an 8” or 10” taping knife, apply a light finish coat of joint compound. Feather the compound beyond the previous coat. The use of all-purpose or topping compound will make for a more durable finish. Let this dry completely, for several hours or overnight.
- Sand lightly with 120 grit sandpaper.
Code Approvals & Performance Standards
- ASTM C1047 Standard Specification for Accessories for Gypsum Wallboard and Gypsum Veneer Base
- SDS For ASTM A653 Steel Finishing Products For Interior Finishing and Exterior Finishing
PRoduct submittal SHeets
Click the below Product Code to view Submittal/Tech Datasheet.
| Product Code | Description |
|---|---|
| CBCO | Clinch-On Dull Corner Bead |
ClarkDietrich SubmittalPro®
Submittal sheets for the exact product you're looking for can be created by using ClarkDietrich's SubmittalPro® Product Submittal System.
- Contact ClarkDietrich Technical Services at 888-437-3244 for any questions about creating product submittals or using SubmittalPro.